Discovering hidden gems at thrift stores and flea markets offers an exciting opportunity to create unique pieces that reflect your personal style while being kind to both your wallet and the environment.
Upcycling has evolved from a niche hobby into a mainstream movement, transforming the way we approach fashion and home décor. Rather than discarding pre-loved items, savvy creators are breathing new life into forgotten treasures, turning them into statement pieces that rival anything found in high-end boutiques. This sustainable approach not only reduces waste but also allows you to express creativity while developing valuable skills that can last a lifetime.
🌿 Why Upcycling Thrifted Items Makes Perfect Sense
The benefits of transforming secondhand finds extend far beyond simple cost savings. When you upcycle thrifted treasures, you’re participating in a circular economy that keeps perfectly usable materials out of landfills. The fashion industry alone generates massive amounts of textile waste annually, and furniture disposal contributes significantly to environmental degradation.
From a financial perspective, upcycling allows you to achieve designer looks without the designer price tag. A $5 thrift store dress can become a stunning custom piece with strategic alterations, while a dated wooden chair can transform into a modern accent piece with paint and new upholstery. Your home and wardrobe become filled with one-of-a-kind items that nobody else owns.
Beyond practicality, there’s something deeply satisfying about the creative process itself. Each project tells a story and showcases your unique vision. You develop problem-solving skills, learn new techniques, and gain confidence in your ability to transform ordinary objects into extraordinary treasures.
🛡️ Essential Safety Guidelines for Upcycling Projects
Before diving into transformation projects, understanding safety protocols ensures your creative endeavors don’t come with unwanted health risks. Thrifted items may have been exposed to various environments, so proper preparation is crucial.
Cleaning and Sanitizing Your Finds
Always thoroughly clean items before beginning any upcycling project. For clothing and textiles, wash items in hot water with detergent, adding white vinegar or borax for extra sanitization. If dealing with delicate fabrics that can’t handle high temperatures, use a fabric-safe disinfectant spray and allow items to air out completely.
Wooden furniture should be cleaned with appropriate wood cleaners and inspected for pests or mold. Metal pieces benefit from a vinegar solution to remove rust and bacteria. Allow all items to dry completely in a well-ventilated area before starting your project.
Protecting Yourself During the Creative Process
Safety equipment isn’t optional when upcycling. Invest in quality supplies that protect you from potential hazards:
- Wear protective gloves when handling paints, solvents, or sharp tools
- Use respiratory masks rated for chemical fumes when working with spray paints or varnishes
- Protect your eyes with safety glasses during sanding or cutting activities
- Work in well-ventilated spaces, preferably outdoors or with windows open and fans running
- Keep a first aid kit nearby for minor accidents
- Dispose of chemical products according to local regulations
Testing for Hidden Hazards
Vintage items, particularly those manufactured before the 1980s, may contain lead paint or other toxic materials. Lead test kits are inexpensive and readily available at hardware stores. If an item tests positive, either abandon the project or take appropriate precautions, including professional stripping services for valuable pieces.
Check wooden furniture for structural integrity before investing time in cosmetic improvements. Loose joints, termite damage, or severe wood rot may make a piece unsafe to use, regardless of how beautiful the transformation might be.
✂️ Transforming Thrifted Clothing into Wardrobe Staples
Your local thrift store’s clothing racks hold unlimited potential for wardrobe updates. With basic sewing skills and creative vision, you can create custom pieces that fit perfectly and express your personal style.
Simple Alterations That Make Major Impact
Not every transformation requires advanced skills. Sometimes the simplest changes create the most dramatic results. Hemming oversized pieces can modernize silhouettes instantly. That floor-length bohemian dress becomes a chic midi when shortened appropriately. Baggy vintage jeans transform into trendy cropped styles with a strategic cut and hem.
Adding or replacing buttons changes a garment’s entire aesthetic. Swap plain plastic buttons for vintage brass ones, decorative wooden toggles, or covered buttons made from complementary fabrics. Similarly, replacing zippers can upgrade a piece from dated to contemporary.
Taking in or letting out seams adjusts fit to flatter your body perfectly. Learning to properly tailor waistbands, side seams, and shoulder seams means every thrifted piece can fit like it was made specifically for you.
Creative Reconstruction Techniques
When you’re ready to advance beyond basic alterations, reconstruction opens infinite possibilities. Combine two garments into one unique piece—the top of one dress with the skirt of another creates something entirely new. Men’s button-up shirts can become feminine blouses with darts added for shaping and sleeves adjusted for proportion.
Oversized sweaters transform into cardigans by cutting up the center front and adding a button band or zipper. Damaged areas can become design features: strategically placed patches, embroidery, or cutwork can disguise stains or holes while adding visual interest.
T-shirts offer particularly versatile canvases. Try these transformation ideas:
- Cut basic tees into crop tops, off-shoulder styles, or racerback tanks
- Add fabric paint, bleach designs, or iron-on transfers for personalization
- Create tied details, weaving, or fringe for texture and dimension
- Layer mesh or lace underneath cut-out designs for edgy appeal
Embellishment and Personalization Ideas
Plain thrifted pieces become statement items with thoughtful embellishments. Hand embroidery adds artisanal charm—floral designs on jacket backs or decorative stitching along hems and cuffs create custom details. If hand stitching seems daunting, fabric paint pens offer similar visual impact with less time investment.
Beading and sequin work transforms simple garments into evening wear. Adding rhinestones to collar edges, creating beaded patterns on solid-colored sweaters, or attaching vintage brooches as permanent embellishments elevates ordinary pieces into extraordinary ones.
Dyeing completely changes a garment’s identity. That stained white blouse becomes a beautiful sage green piece. Faded black jeans regain their depth. Experiment with tie-dye, ombré effects, or solid color transformations to refresh tired pieces.
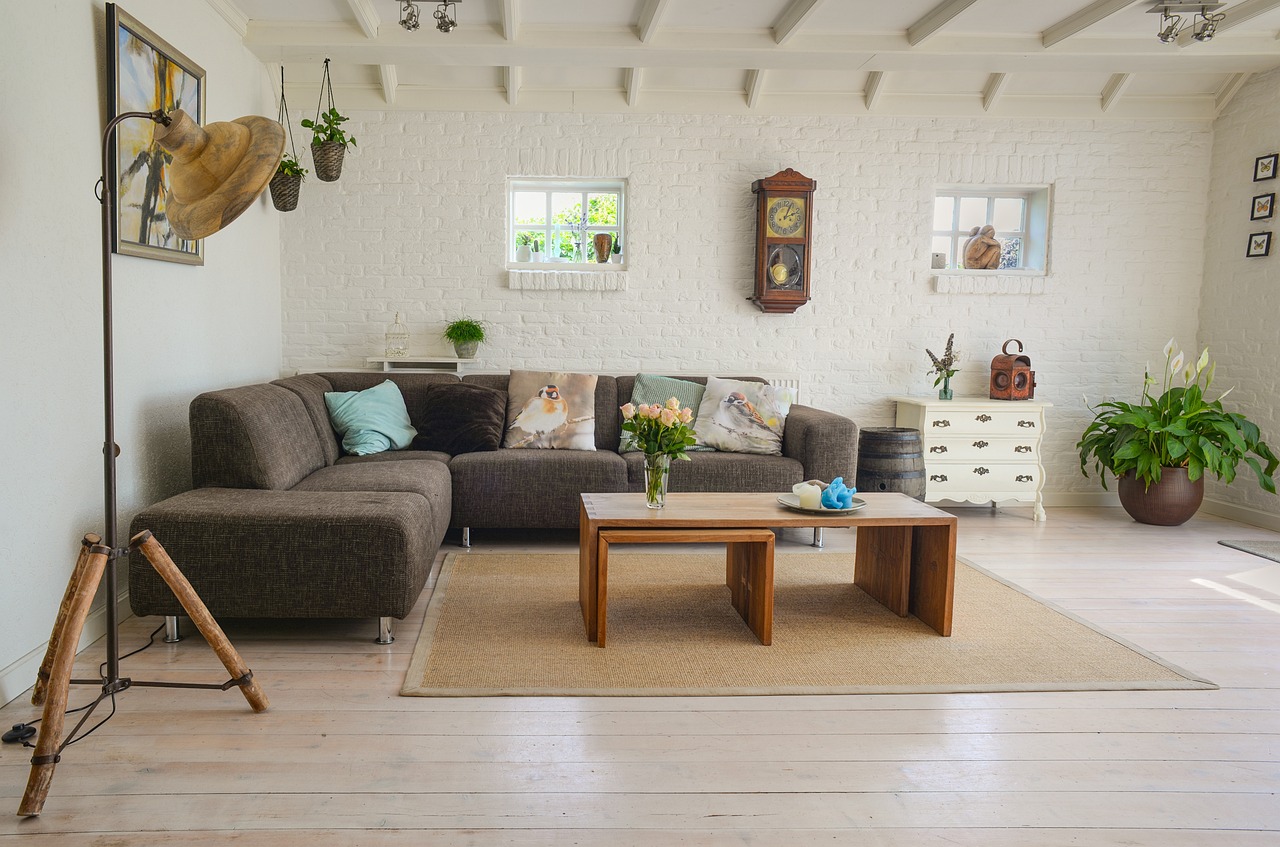
🏠 Furniture and Home Décor Upcycling Projects
Thrift stores overflow with furniture and home accessories waiting for transformation. With patience and the right techniques, you can create custom pieces that rival expensive boutique finds.
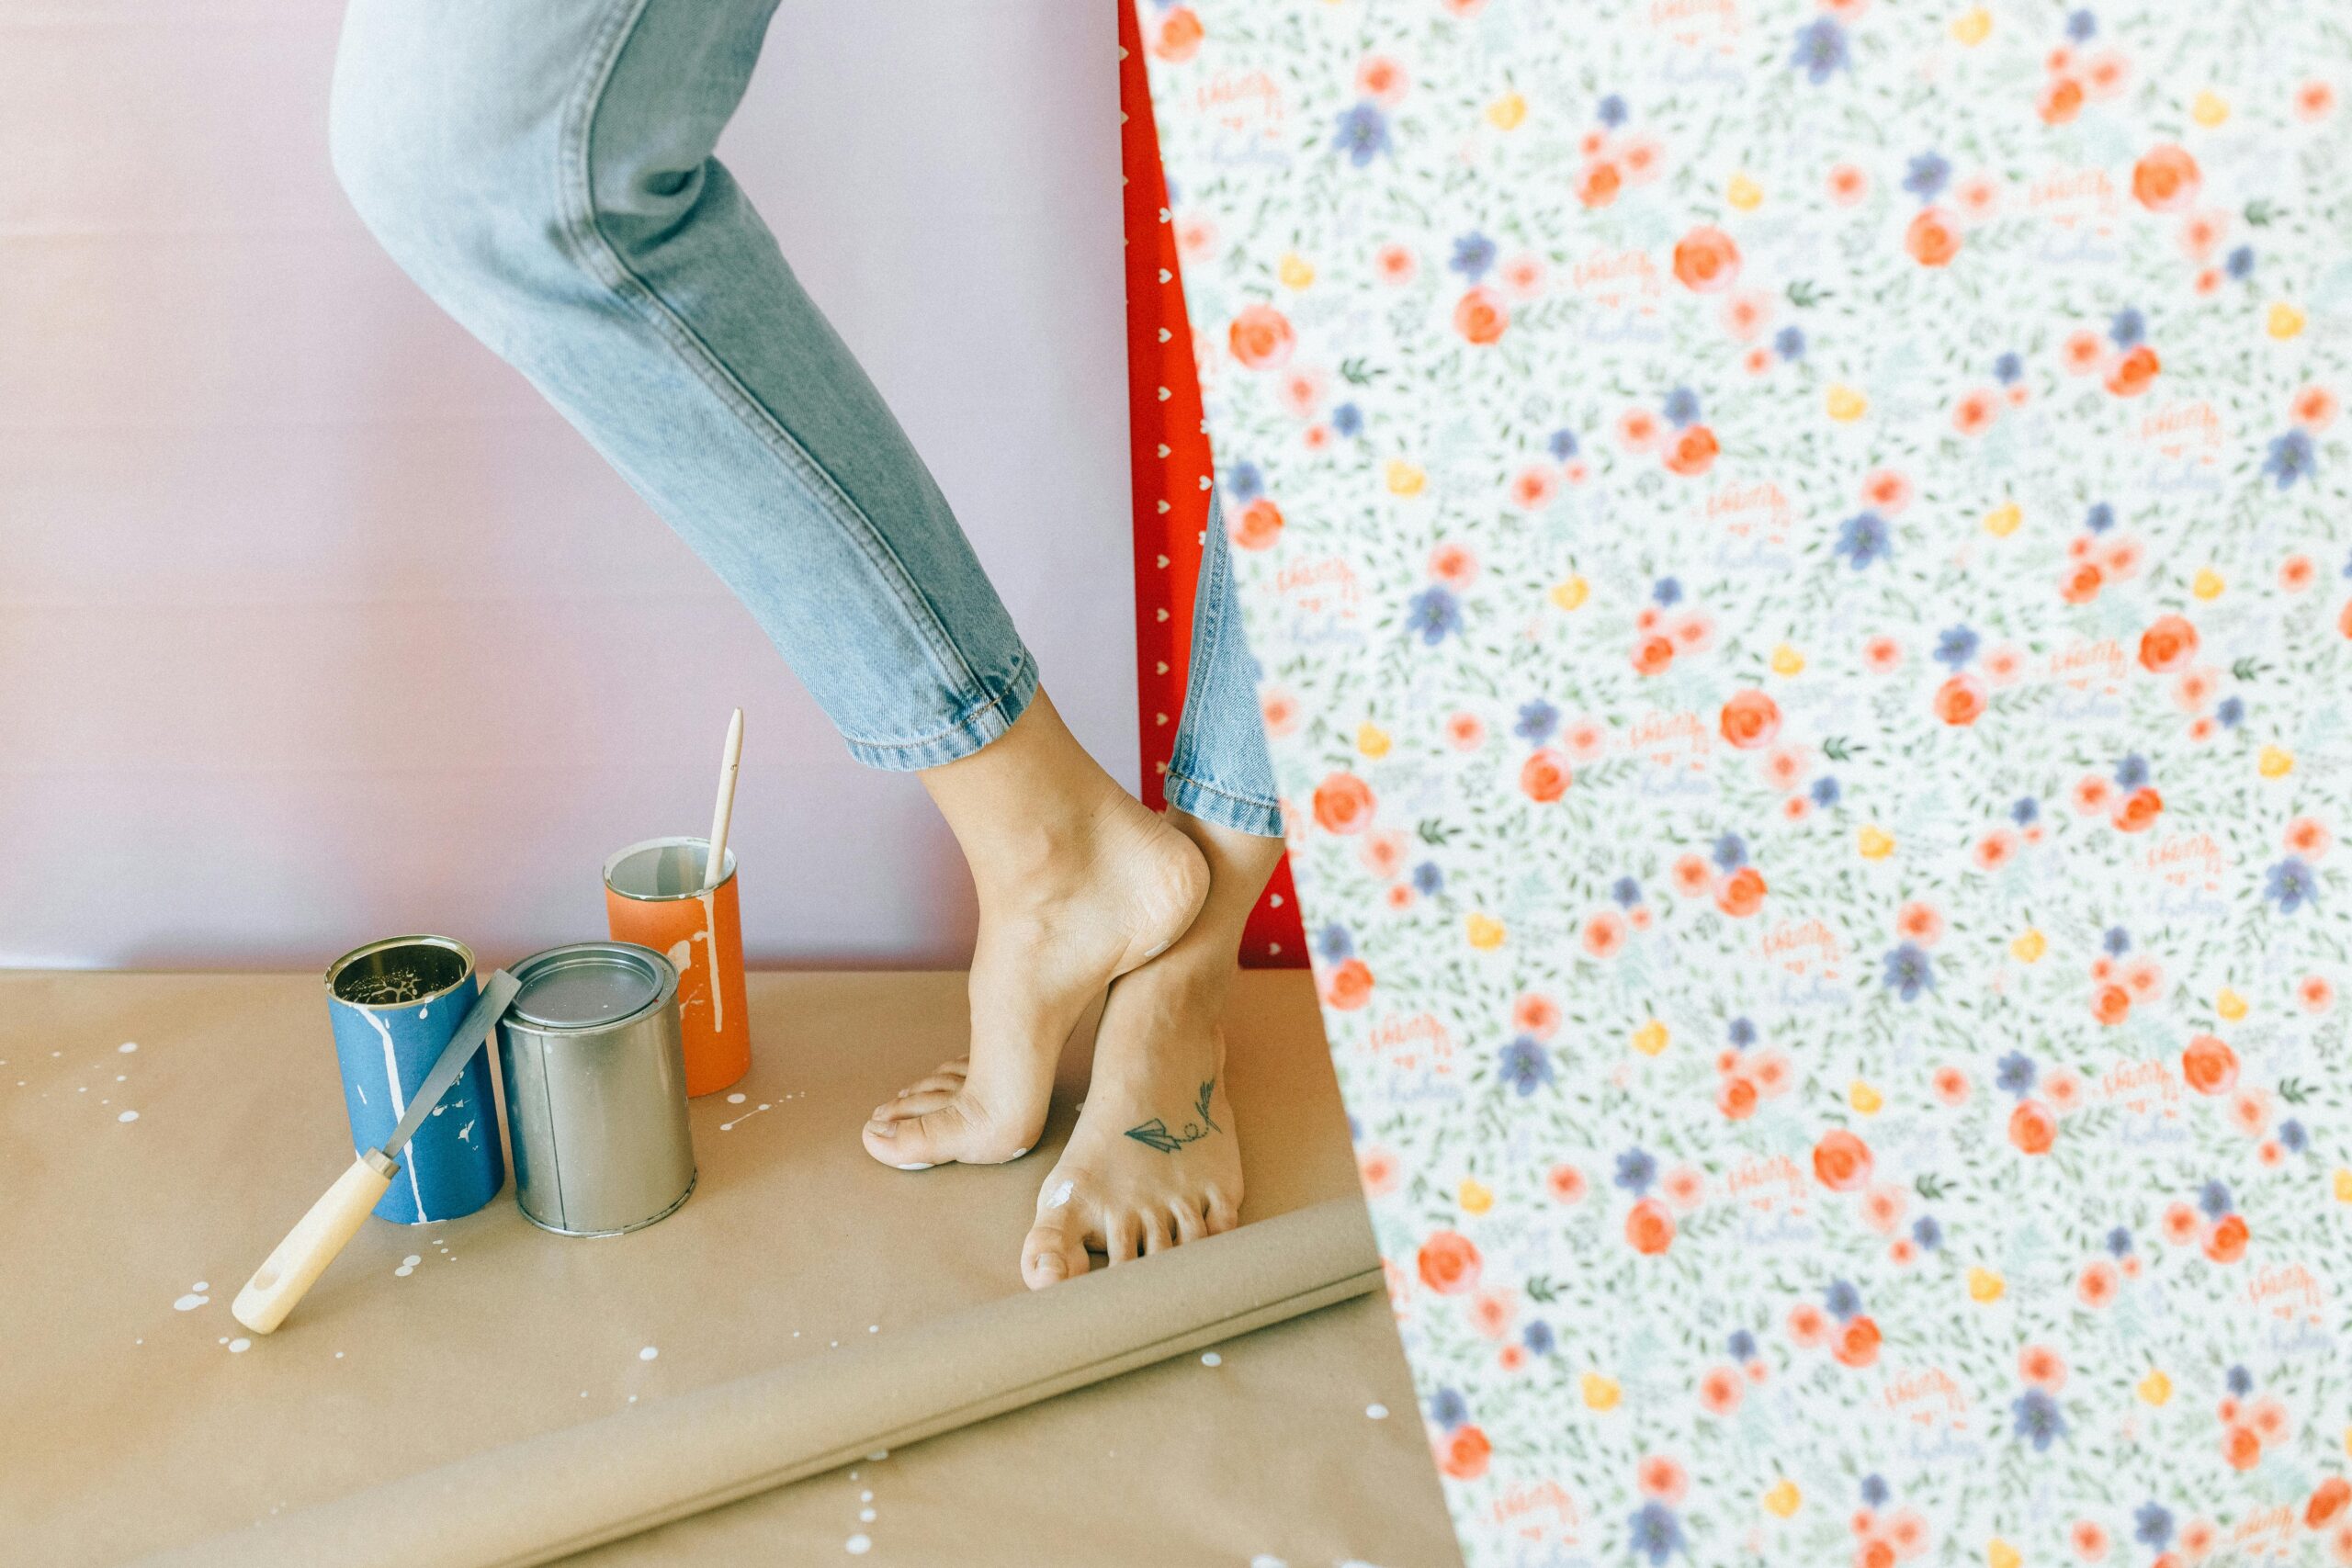
Painted Furniture Transformations
Paint remains the quickest way to completely transform furniture. Proper preparation ensures professional-looking results that last for years. Begin by thoroughly cleaning pieces, then sand surfaces to create texture for paint adhesion. Fill any gouges or deep scratches with wood filler, sanding smooth once dry.
Primer is non-negotiable for quality results. It seals wood, prevents stains from bleeding through, and provides the ideal surface for topcoat adhesion. Choose primer appropriate for your specific project—some are formulated for bare wood, others for previously painted surfaces, and specialized versions handle glossy finishes.
Your paint choice impacts both appearance and durability. Chalk paint offers a matte, vintage aesthetic and requires minimal preparation, though it needs sealing with wax or polyurethane. Latex paint provides durability and comes in countless colors. For ultimate toughness on high-use pieces like tables and dressers, consider furniture-specific paints or adding a polyurethane topcoat.
Reupholstery and Fabric Updates
Don’t overlook furniture with good bones but tired upholstery. Reupholstering sounds intimidating but becomes manageable when you start with simple projects. Dining chairs offer perfect beginner-friendly options—seats typically attach with just a few screws and require only basic stapling skills to recover.
Choose upholstery-weight fabrics that withstand regular use. Consider performance fabrics that resist stains and wear, especially for high-traffic areas. Bold patterns can become statement pieces, while solid colors offer versatility that adapts as your décor evolves.
If full reupholstery seems too ambitious, consider partial updates. Replace just the cushions on that vintage sofa. Add new throw pillows in contemporary fabrics. Slipcovers offer completely reversible transformations without permanent commitment.
Hardware and Detail Upgrades
Sometimes the smallest changes create the biggest impact. Replacing outdated hardware instantly modernizes dressers, cabinets, and desks. Swap brass pulls for sleek modern handles, or replace basic knobs with ornate vintage glass ones. Hardware stores and online retailers offer endless options at various price points.
Consider adding details where none existed. Attach decorative trim to plain drawer fronts. Apply wood appliqués before painting for dimensional interest. Stencil designs onto flat surfaces or use painter’s tape to create geometric patterns with multiple paint colors.
Creative Repurposing Ideas
Sometimes the best transformations completely reimagine an item’s original purpose. That vintage ladder becomes a blanket rack or towel holder. Old windows transform into picture frames or room dividers. Wooden crates stack to create shelving units or side tables.
Suitcases become quirky storage solutions or pet beds. Teacups and saucers convert into candle holders or jewelry organizers. Mason jars serve as vases, bathroom organizers, or pendant light fixtures. The key is seeing potential beyond original intent.
🎨 Essential Tools and Materials for Successful Upcycling
Building a basic toolkit ensures you’re prepared for various projects without overwhelming your space or budget. Start with essentials and expand as your skills and interests develop.
Must-Have Tools for Beginners
For clothing projects, invest in quality scissors specifically for fabric, a seam ripper for correcting mistakes, basic hand-sewing needles, and a measuring tape. If budget allows, a basic sewing machine dramatically expands possibilities, though many projects work perfectly with hand-stitching.
Furniture transformations require sandpaper in various grits (coarse for initial sanding, fine for finishing), paintbrushes in multiple sizes, a staple gun for upholstery projects, and basic screwdrivers. A power drill with basic bits proves invaluable for numerous applications.
Stocking Your Supply Cabinet
Keep frequently used supplies on hand to avoid project delays. White primer, basic paint colors (white, black, and a few neutrals), painter’s tape, wood glue, fabric glue, thread in common colors, and sandpaper should always be available.
Build a collection of embellishments gradually. Save interesting buttons from garments beyond repair. Collect fabric scraps for future projects. Purchase trim, ribbon, and decorative elements when you find good deals, even without specific projects in mind.
💡 Finding Inspiration and Planning Projects
Successful upcycling balances creative vision with practical execution. Before purchasing items to transform, consider where you’ll use the finished piece and whether it matches your aesthetic.
Social media platforms overflow with inspiration. Follow upcycling accounts that match your style preferences. Save ideas that excite you, but don’t feel obligated to copy exactly—use them as starting points for your unique interpretation.
Before starting projects, sketch your vision or create a mood board with color swatches and design elements. This planning prevents mid-project confusion and helps you gather necessary supplies beforehand.
🌟 Troubleshooting Common Upcycling Challenges
Even experienced upcyclers encounter obstacles. Understanding how to address common issues prevents frustration and abandoned projects.
Paint and Finish Problems
If paint isn’t adhering properly, the surface likely needs more preparation. Strip back to bare wood and start with proper sanding and priming. Brush strokes showing through can be minimized with foam rollers or by adding a paint extender to your topcoat.
Yellowing white paint usually indicates the underlying wood contains tannins. Apply a shellac-based primer before painting to seal these oils. If yellowing appears after painting, the primer wasn’t adequate—you’ll need to start over with better sealing.
Fabric and Sewing Issues
When machine stitches bunch or skip, check your needle—it may be dull or the wrong type for your fabric. Adjust thread tension if necessary. For slippery fabrics, use tissue paper between fabric and presser foot, tearing it away after stitching.
If seams pucker, you’re likely stretching fabric while sewing. Let the machine feed fabric naturally without pulling. For knit fabrics, a ballpoint needle and slight zigzag stitch prevents this issue entirely.
♻️ Sustainable Practices in Your Upcycling Journey
Maximize the environmental benefits of upcycling by maintaining sustainability throughout your creative process. Choose water-based paints and finishes when possible, reducing harmful chemical exposure for both you and the environment.
Save and repurpose every usable scrap. Fabric remnants become stuffing, cleaning rags, or small accessories. Wood scraps can be painted and used for decorative accents or craft projects. Even sawdust can go into compost bins.
Shop your own home before buying new supplies. That half-used can of paint might work perfectly for your next project. Buttons from old garments can embellish new ones. Developing a resourceful mindset enhances creativity while reducing consumption.
🎯 Building Skills and Growing Confidence
Every expert upcycler started as a beginner. Accept that early projects may not turn out perfectly—they’re learning experiences that build valuable skills. Start with simpler transformations, gradually attempting more complex projects as your confidence grows.
Document your progress with before and after photos. You’ll be amazed at how quickly your skills develop. These records also help you remember techniques that worked well and avoid repeating mistakes.
Consider joining online communities of fellow upcyclers. These groups offer encouragement, troubleshooting advice, and inspiration. Sharing your projects receives positive feedback that motivates continued creativity.
Upcycling thrifted treasures offers endless possibilities for expressing creativity while creating a sustainable, personalized lifestyle. Whether you’re transforming a thrift store dress into your new favorite outfit or turning a dated dresser into a stunning statement piece, each project develops skills, saves money, and reduces environmental impact. The combination of safety consciousness, proper technique, and creative vision ensures your upcycled pieces become beloved additions to your home and wardrobe for years to come. Start small, practice patience, and watch as ordinary secondhand items transform into extraordinary treasures that reflect your unique style and values.