Thrift projects offer an incredible opportunity to transform forgotten treasures into stunning pieces for your home while saving money and reducing waste. Whether you’re refinishing furniture, upcycling clothing, or restoring vintage finds, safety should always be your top priority alongside creativity.
Diving into the world of thrift flipping can feel overwhelming for beginners, especially when you’re unsure about handling old materials, chemical products, and various tools. The good news is that with the right knowledge and preparation, you can tackle any project confidently while keeping yourself protected and looking great doing it.
🛡️ Understanding the Hidden Dangers in Thrift Projects
Before you get excited about that vintage dresser or retro chair, it’s crucial to recognize potential hazards lurking in secondhand items. Many thrifted pieces come with unknown histories, and that mystery can include exposure to harmful substances, structural weaknesses, or materials that require special handling.
Lead paint remains one of the most significant concerns when working with furniture manufactured before 1978. This toxic coating can release dangerous particles when sanded or stripped, posing serious health risks if inhaled or ingested. Similarly, old upholstered items may harbor mold, dust mites, or even bed bugs that can trigger allergies or spread to your home.
Wood finishes, adhesives, and previous repair attempts on thrifted items often involve chemicals that can off-gas or react unpredictably with new products you apply. Understanding these risks isn’t meant to scare you away from thrifting—it’s about approaching projects with informed caution and proper protective measures.
Essential Personal Protective Equipment You Actually Need
Investing in quality safety gear is non-negotiable when starting your thrift project journey. Your personal protective equipment (PPE) serves as the first line of defense against chemicals, dust, sharp edges, and other hazards you’ll encounter during restoration work.
Respiratory Protection Beyond Basic Masks
A simple dust mask won’t cut it for most thrift projects. You need a respirator rated for the specific materials you’re handling. For sanding and general dust protection, an N95 or N99 mask provides adequate filtration. However, when working with paint strippers, varnish removers, or spray paints, upgrade to a respirator with organic vapor cartridges that filter out chemical fumes.
Make sure your respirator fits properly by performing a seal check each time you wear it. Facial hair can compromise the seal, so consider this when planning your project timeline. Replace filters according to manufacturer recommendations—expired or clogged filters offer minimal protection.
Eye and Face Protection That Works
Safety glasses are mandatory, but not all protective eyewear is created equal. Look for ANSI-certified safety glasses with side shields that protect against flying debris from sanding, drilling, or hammering. For chemical work involving strippers or cleaners, upgrade to goggles that seal completely around your eyes, preventing splashes from any angle.
Face shields add an extra layer of protection when using power tools or working with particularly messy chemical applications. They’re especially valuable when spray painting or using aerosol products that can drift unpredictably.
Hand Protection for Different Tasks
Different gloves serve different purposes in thrift projects. Nitrile gloves offer excellent chemical resistance for painting, staining, and cleaning tasks while providing decent tactile sensitivity. For heavy-duty work involving rough materials or sharp edges, leather work gloves protect against cuts and abrasions.
Keep multiple pairs on hand and change them regularly. Contaminated gloves can spread chemicals to clean surfaces or your face if you touch it absentmindedly. Never reuse disposable gloves that have been exposed to solvents or strippers.
Creating Your Dedicated Workspace Safely
Where you work matters almost as much as what protective gear you wear. A proper workspace setup prevents accidents, minimizes exposure to harmful substances, and makes projects more enjoyable and efficient.
Ventilation is absolutely critical when working with any chemical products. Ideally, work outdoors or in a garage with open doors on opposite sides to create cross-ventilation. If you must work indoors, position fans to blow fumes away from your breathing zone toward open windows or doors. Never work with chemicals in enclosed spaces, even with a respirator—oxygen displacement in poorly ventilated areas can cause dizziness or worse.
Your work surface should be sturdy and protected. Cover floors and tables with drop cloths or cardboard to catch drips and spills. Keep a dedicated trash container nearby for disposing of contaminated materials like used gloves, rags, and applicators. Never let chemical-soaked materials accumulate—some can spontaneously combust when wadded together.
🧰 Tool Safety Fundamentals for Beginners
Power tools intimidate many beginners, but they’re incredibly useful for thrift projects when used correctly. The key is respecting each tool’s capabilities and limitations while following fundamental safety principles.
Always read the manual before using any new tool. Manufacturers include specific safety information about their products that generic advice can’t cover. Keep tools properly maintained with sharp blades and bits—dull cutting edges require more force and are more likely to slip and cause injury.
Secure your workpiece before cutting, drilling, or sanding. Hand-holding items while using power tools ranks among the most common causes of DIY injuries. Use clamps, vises, or helpers to stabilize pieces, keeping your hands well away from blades and bits.
Electrical Safety You Can’t Ignore
Check power cords for damage before plugging in any tool. Frayed or exposed wires can cause shocks or fires. Use ground fault circuit interrupter (GFCI) outlets when working in damp environments or outdoors, as these devices cut power instantly if they detect electrical leakage.
Extension cords should be rated for the amperage your tools draw. Undersized cords can overheat and cause fires. Keep cords away from heat sources, sharp edges, and wet areas. Never yank cords to unplug them—grasp the plug itself to avoid damaging the connection.
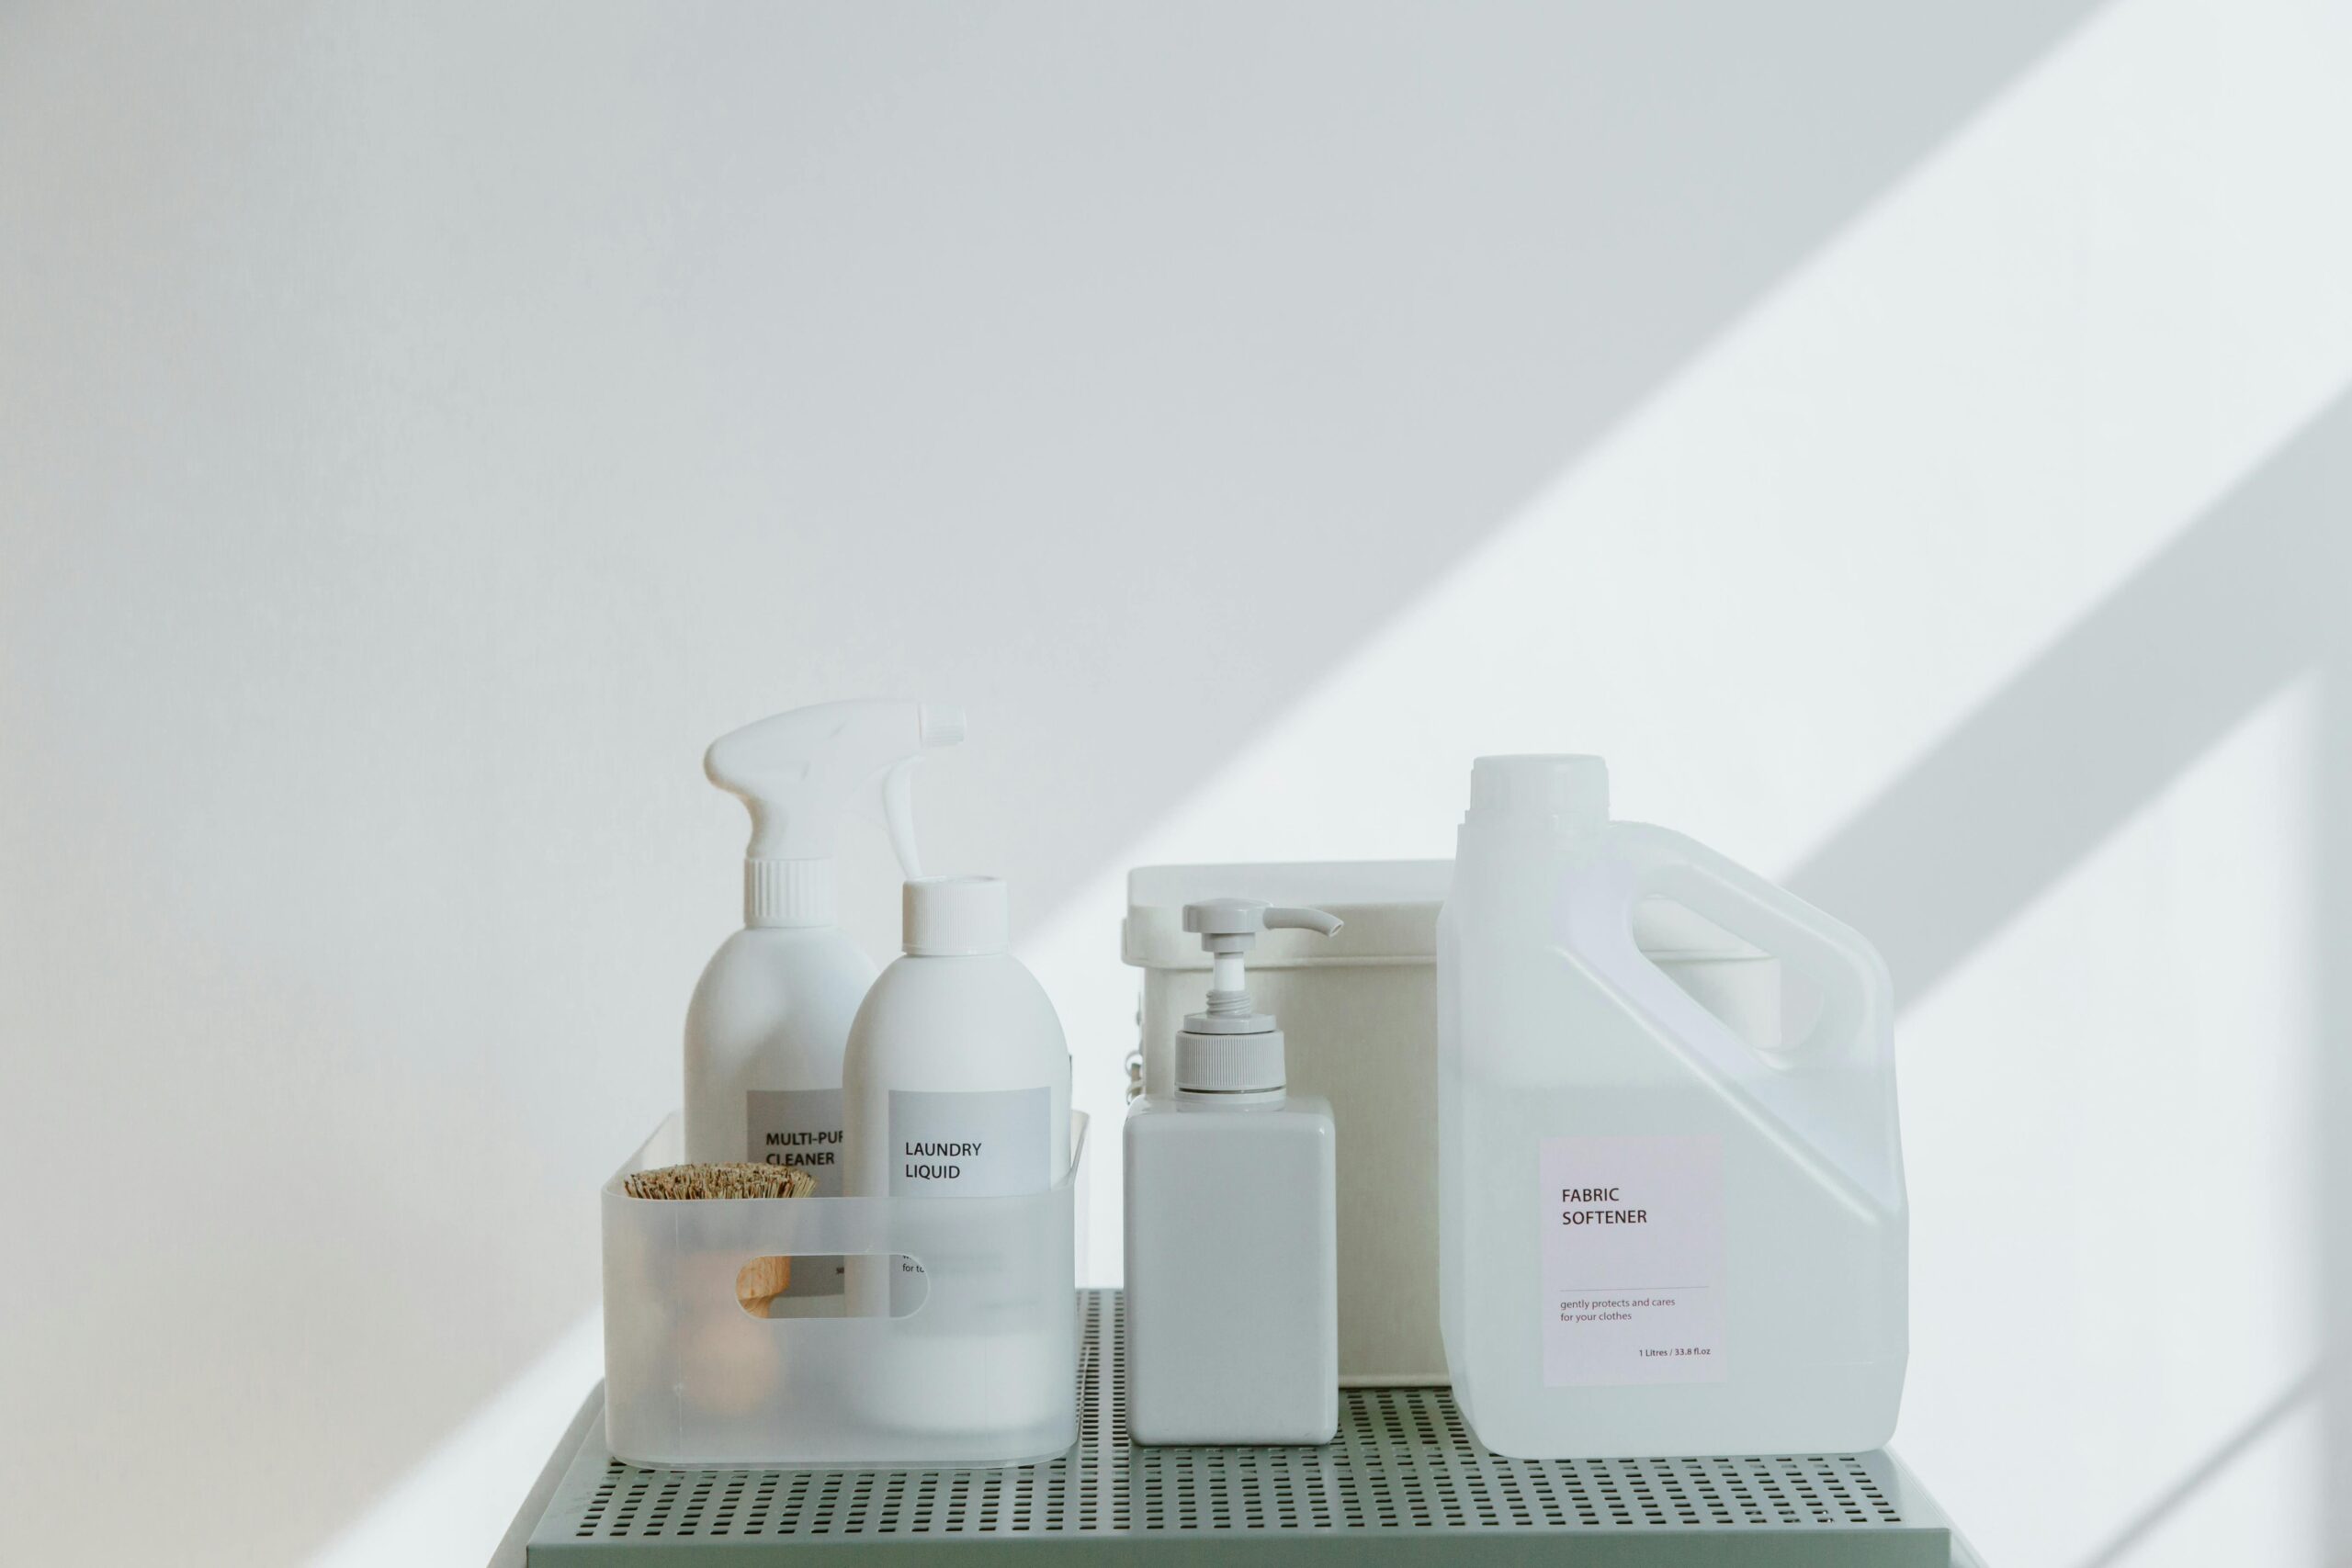
Chemical Safety: Beyond Reading Labels
Paint strippers, mineral spirits, polyurethane, wood stains, and cleaning products contain chemicals that demand respect and careful handling. While labels provide important information, beginners often miss crucial safety considerations.
Always mix and apply chemicals in well-ventilated areas while wearing appropriate respiratory protection. Never combine products unless explicitly directed by manufacturers—mixing cleaners or strippers can create toxic gases. Pour chemicals away from your body to prevent splashes toward your face, and always add acid to water, never water to acid, when dilution is needed.
Store chemicals in their original containers with labels intact. Transferring products to unmarked containers creates confusion and dangerous situations. Keep chemicals in a cool, dry location away from living spaces, and ensure lids are tightly sealed to prevent vapors from escaping.
Emergency Preparedness for Chemical Exposure
Despite your best precautions, spills and splashes can happen. Keep a first aid kit specifically for chemical emergencies near your workspace. This should include eye wash solution, chemical burn treatment, and emergency contact numbers including poison control.
If chemicals contact your skin, immediately rinse the area with copious amounts of water for at least 15 minutes while removing contaminated clothing. For eye exposure, flush with water or eye wash solution for at least 20 minutes and seek medical attention. Keep Safety Data Sheets (SDS) for all chemicals on hand—medical professionals need this information to provide appropriate treatment.
Testing Thrifted Items Before You Begin
Smart safety starts before you ever pick up a tool. Testing and inspecting thrifted pieces reveals hidden hazards and helps you plan appropriate precautions for your specific project.
Lead paint testing kits are inexpensive and easy to use. Test any painted furniture made before 1978, especially pieces with multiple paint layers or a chalky surface. If lead is present, you have several options: leave the piece as-is and simply clean it, encapsulate the existing paint with new coatings, or hire a certified lead abatement professional for proper removal.
Check structural integrity before beginning cosmetic work. Wobbling legs, loose joints, or cracked wood can cause collapses while you’re working on pieces. Address structural issues first or determine whether the item is worth the effort and risk of restoration.
👕 Staying Stylish While Staying Safe
Safety gear doesn’t mean sacrificing personal style or feeling like you’re wearing an astronaut suit. Modern protective equipment comes in various designs, colors, and styles that let you express yourself while staying protected.
Choose work clothes that are comfortable and protective but also make you feel confident. Long sleeves and pants made from tightly woven fabrics protect your skin from chemicals and flying debris. Many brands now offer work wear in flattering cuts and appealing colors beyond traditional beige and navy.
Closed-toe shoes with non-slip soles are essential, but you don’t need ugly steel-toed boots for most thrift projects. Many companies make safety shoes and boots that look like regular sneakers or casual footwear while providing protection against dropped items and punctures.
Consider investing in a stylish work apron with multiple pockets to keep tools and supplies organized while protecting your clothes. Cross-back aprons distribute weight evenly and prevent neck strain during long project sessions. Look for water-resistant materials that wipe clean easily.
Building Your Thrift Project Safety Kit
Having the right supplies organized and accessible makes every project safer and more efficient. Create a dedicated safety kit that travels with you to thrift stores and stays in your workspace for quick access.
- Multiple respirators with appropriate cartridges for different tasks
- Safety glasses and chemical-resistant goggles
- Various glove types (nitrile, leather, heat-resistant)
- First aid supplies including burn treatment and eye wash
- Lead paint testing swabs
- Fire extinguisher rated for multiple fire types
- Flashlight for inspecting dark furniture interiors
- Measuring tape for assessing whether items fit your vehicle and workspace
- Drop cloths and protective coverings
- Container for disposing of contaminated materials
Learning from Mistakes Without Paying in Injuries
Every experienced thrift flipper has stories about projects gone wrong. The difference between a learning experience and a tragedy often comes down to having proper safety measures in place when mistakes happen.
Start with simpler projects that don’t involve complex tool use or hazardous materials. Clean, simple furniture refinishing with water-based products offers a gentler learning curve than chemically stripping ornate pieces with unknown paint histories. Build your skills and safety awareness gradually before tackling more challenging restorations.
Don’t rush projects to meet artificial deadlines. Hurrying leads to shortcuts that compromise safety. If you’re feeling tired, frustrated, or distracted, stop working. More accidents happen during the last fifteen minutes of a project when exhaustion sets in than at any other time.
Creating Sustainable Safety Habits
Making safety automatic rather than an afterthought requires developing consistent habits that become second nature over time. Start each project session with a safety check, even for tasks you’ve done dozens of times before.
Put on your PPE before beginning work, not partway through when you realize you need it. This seems obvious, but many beginners convince themselves they’ll “just do this one quick thing” without protection, then get absorbed in the work and forget to gear up properly.
Clean up thoroughly after each work session. Dispose of chemical-soaked materials properly, wipe down surfaces to remove dust and residue, and store tools and chemicals securely. A clean workspace is a safer workspace—clutter causes trips, spills, and confusion about what’s where.
When to Ask for Help or Walk Away
Recognizing your limitations isn’t admitting defeat—it’s exercising good judgment. Some thrift projects require professional expertise, specialized equipment, or experience you simply haven’t developed yet. Knowing when to seek help or pass on a project protects both your safety and your investment.
If a piece tests positive for lead paint and you want the existing coating completely removed, hire a certified professional. DIY lead removal creates health hazards that aren’t worth the money saved. Similarly, major structural repairs, electrical work, or projects involving asbestos-containing materials should be left to qualified experts.
Sometimes the best safety decision is passing on a thrifted item entirely. If a piece feels unstable, smells strongly of mold or chemicals, or shows signs of severe pest infestation, no amount of safety gear makes it worth bringing into your workspace or home.
🌟 Embracing the Journey with Confidence
Safety-conscious thrift flipping doesn’t mean living in fear or avoiding interesting projects. It means approaching restoration work with respect for potential hazards, appropriate protective measures, and realistic assessment of your skills and resources.
Every safe project completion builds your confidence and expands your capabilities. You’ll find yourself naturally incorporating safety checks into your routine, selecting appropriate protective gear without thinking, and recognizing potential hazards before they become problems. This intuitive safety awareness allows you to focus more energy on creativity and craftsmanship.
The thrift community is incredibly supportive of beginners who prioritize safety. Online forums, social media groups, and local workshops offer opportunities to learn from experienced flippers who’ve navigated the same concerns you’re facing. Don’t hesitate to ask questions—the only foolish question is the one that goes unasked when safety is involved.
Remember that protecting yourself while creating beautiful, sustainable pieces from thrifted treasures isn’t just about avoiding injuries. It’s about building a hobby or business that brings long-term joy rather than short-term regrets. Your health and wellbeing enable countless future projects, making safety the foundation of sustainable creativity.
Start your next thrift project armed with knowledge, proper equipment, and the confidence that comes from taking safety seriously. That vintage dresser or retro chair isn’t going anywhere—take the time to prepare properly, and you’ll enjoy both the process and the results for years to come. Stay safe, stay stylish, and transform those thrifted finds with confidence!